
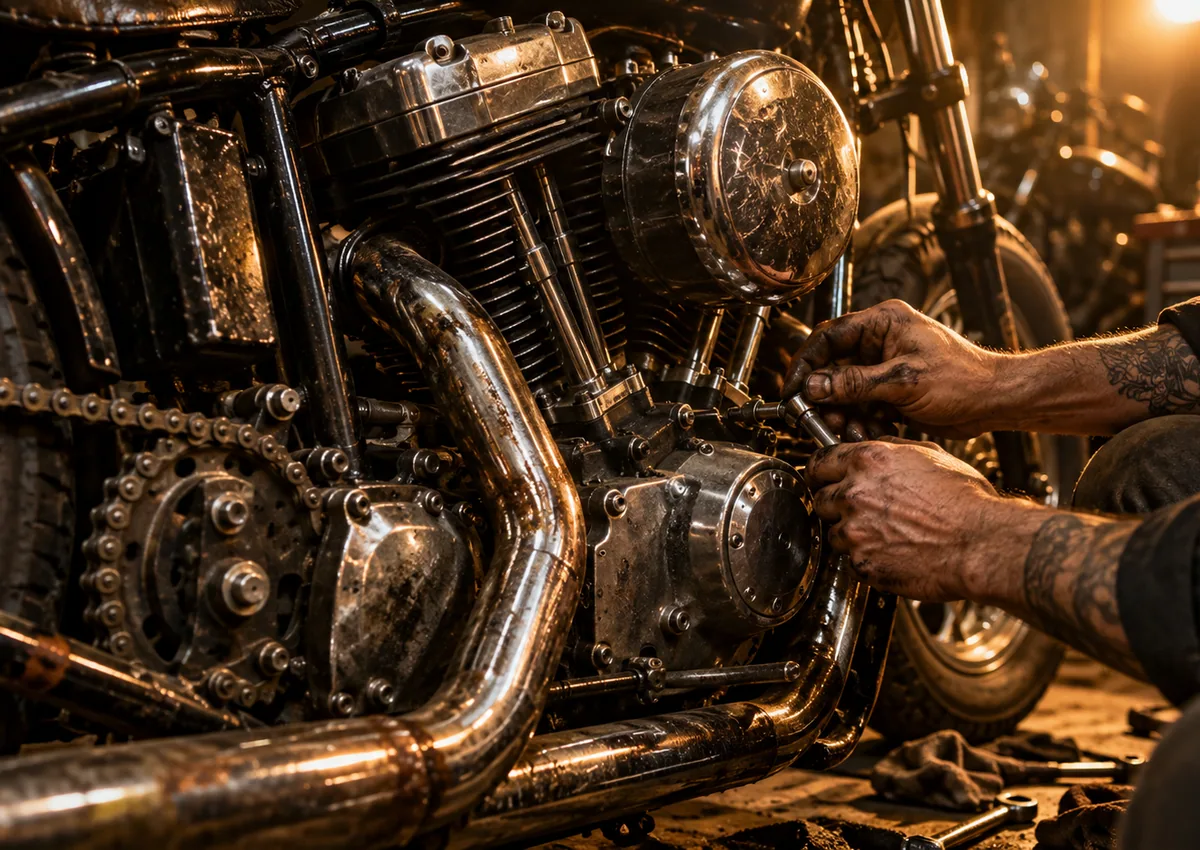
KNUCKLEHEAD: THE MOTOR, THE DESIGN AND THE REAL WORK.
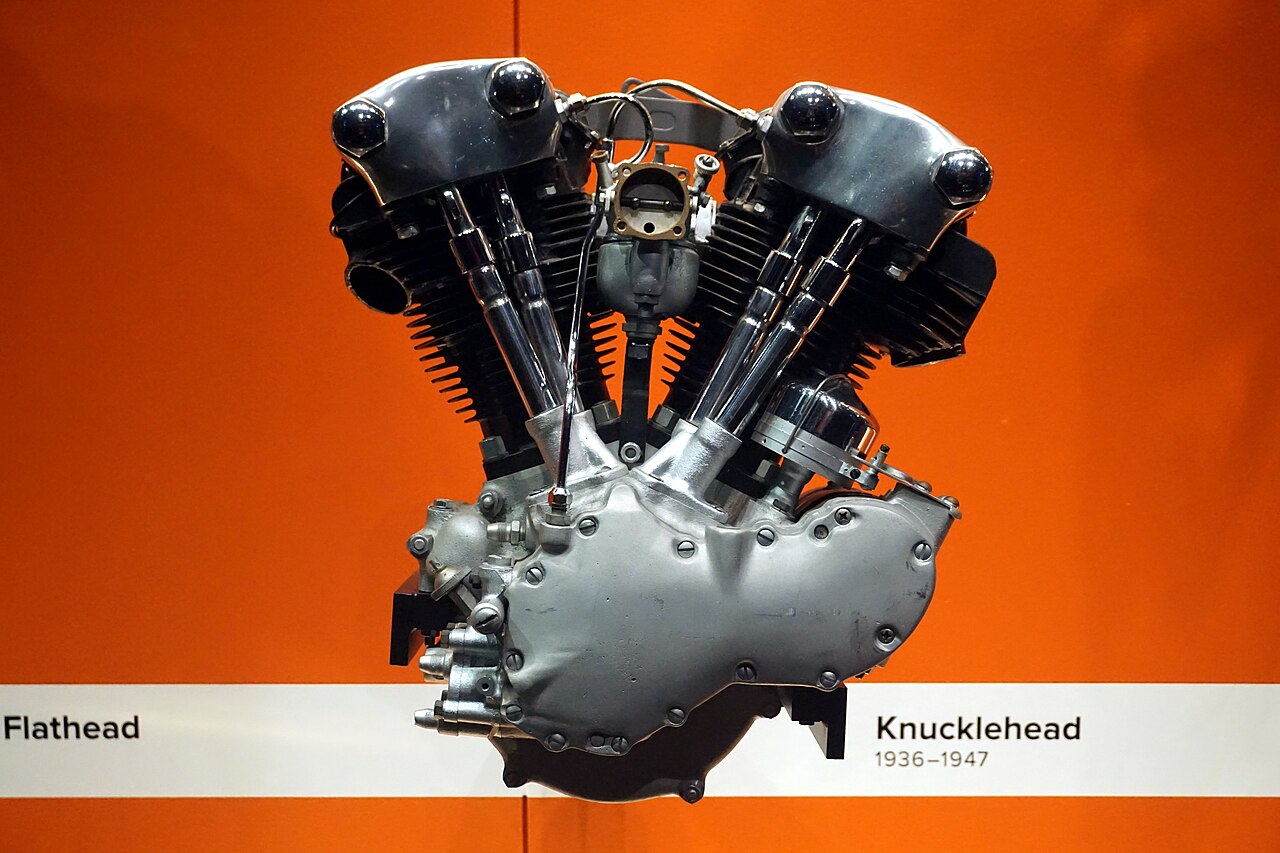
The Knucklehead established the production overhead-valve Big Twin architecture that made Harley-Davidson famous. Its exposed pushrod geometry, iron cylinders and heads, gear-driven single camshaft and distinct rocker housings make it an instantly recognizable piece of American engineering.
61-inch E/EL designs appeared in 1936; 74-inch F/FL models followed in 1941. Exact factory codes and running changes must be checked against the engine's model year, rather than guessed from paint, rocker-box appearance or a customized frame.
ENGINE IDENTITY
Years: 1936–1947
Nominal displacement: 61 cu in / 74 cu in
Layout: Air-cooled 45-degree pushrod V-twin; two valves per cylinder, historical Big Twin construction
These are general family characteristics. Build year, specific model and the actual parts installed determine correct service parts and procedures.
FACTORY DEVELOPMENT TIMELINE
Not a full serial-number databaseFirst production Harley Big Twin overhead-valve 61-inch engine; important first-year-only features
74-cubic-inch version joins the family
Final Knucklehead production year before the 1948 Panhead
HOW THIS V-TWIN MAKES POWER
A simplified conceptual map. Exact oil and valve routing depend on the model and modification history; it is not a workshop service diagram.
ENGINE TECH LIBRARY
JUMP TO A SYSTEM
The mechanical layout
At its core the Knuckle uses a 45-degree air-cooled V-twin with one crankpin, overhead poppet valves, pushrods and rocker arms. The camshaft is housed low in the crankcase and drives the tappets through a gear train. Cylinder heads and barrels are cast iron; aluminum crankcases support the crank assembly. Heavy flywheels and the firing sequence give the engine its distinctive low-speed cadence.
Unlike a later overhead-cam engine, the Knuckle places its cam below the cylinders. A cam lobe raises a tappet, the pushrod operates a rocker, and the rocker opens the valve against spring pressure. This arrangement is compact, but geometry, rocker-bushing wear and correct valve motion matter greatly on a worn engine.
- 45-degree V-twin and a shared crankpin
- Single gear-driven cam and four pushrod-operated overhead valves
- Cast-iron heads and cylinders; separate gearbox on traditional Big Twin models
- Early production differences mean 'fits a Knuckle' is never a safe parts specification
Why the rocker boxes matter
The signature rocker housings earned the engine its nickname. Beyond their appearance, they determine how rocker shafts are supported and how valve motion and top-end oil return are managed. Any wear at shafts or bushings can make a correctly adjusted engine noisy, while inadequate lubrication or distorted components cause more serious damage.
Before replacing parts, inspect the castings, rocker shaft support, valve guides, spring hardware, and the routing of top-end oil lines as a complete system. Reproduction covers and heads may not match original 1930s and 1940s factory castings, so document what is actually installed.
- Inspect rocker arm end play, shaft wear and bushing fit
- Check pushrod and rocker contact patterns, not just noise
- Confirm intake and exhaust valve geometry and valve spring suitability
- Keep photographic records of stampings and casting numbers
Oiling architecture — the big leap
The Knucklehead was an important advance because its engine oil circulated back to an external tank instead of depending on the old total-loss approach. A supply side sends oil toward the bearings and upper engine, while scavenging returns accumulated oil to the tank. This is the principle of a dry-sump system.
Because oil can drain past a check valve while parked, some engines expel oil from the breather on startup. Riders call this wet-sumping, but not every leak or puddle has the same cause. Persistent failure to return oil, high oil consumption, poor breathing or overheating needs investigation rather than assuming it is normal old-Harley behavior.
- Confirm the oil tank is properly plumbed for the specific pump configuration
- Examine feed/check arrangements and oil return before extended running
- Inspect breather timing, crankcase ventilation and oil-line restrictions
- Never add oil solely because a cold tank appears low without following the correct manual procedure
Fuel, ignition and starting
Original-period examples typically use a single carburetor, breaker-point ignition, a generator charging system, and kick starting, though decades of modifications are common. The control system can be very different from a modern machine: manual spark advance, hand shift and foot clutch depend on year and model configuration.
Poor hot starting can result from fuel mixture, ignition advance, weak spark, leaking intake manifolds, valve sealing or ordinary wear. Do not solve every hot-start problem by fitting a larger carburetor. Establish correct compression, timing, fuel delivery and wiring first.
- Verify whether magneto, distributor, points and carburetor are original or aftermarket
- Check generator output, regulator and battery condition as a matched system
- Inspect intake seals before changing jets
- Use model-specific timing references; do not copy modern advance values
Cases, bearings, crank and primary drive
Engine cases, flywheels, connecting rods, main bearings and the separate primary/gearbox package form a system. Every performance rebuild should begin with determining crankshaft runout, bearing condition, case integrity and correct end clearances using the factory procedure.
Historical motorcycles may have replacement engines, mixed-year case halves or later transmission swaps. A serial number alone does not prove that the complete motorcycle is original. Never buy expensive gears or primary parts based only on 'Knucklehead' in a classified advertisement.
- Check case mating surfaces and repairs for cracks or welds
- Verify flywheel trueness and bearing/race condition
- Determine whether a clutch, chain, shaft or transmission has been changed
- Use provenance, casting dates and service records when originality matters
Typical problem-solving approach
External oil leaks, irregular oil return, tappet and rocker noise, hard starting, charging problems and detonation are recurring owner concerns. These are symptoms with multiple possible causes, not universal faults that every Knucklehead shares.
Start with a controlled inspection: identify the exact machine, check the fluid level under correct conditions, perform compression and leakdown checks where appropriate, inspect ignition and charging, look at intake integrity and then evaluate valve train and oil system. Record each change so the next mechanic knows what was tested.
- Separate oil leaks from pressure/return problems
- Distinguish mechanical clatter from ignition misfire
- Check valve sealing before selecting pistons or camshafts
- Keep measurements and parts receipts with the motorcycle
Period-correct restoration versus performance builds
A factory-oriented Knuckle restoration preserves displacement, visible castings, finish, controls and ignition details appropriate to the year. A rider-oriented custom may use improved materials, modern seals, ignition upgrades, a matched carburetor and a carefully engineered exhaust, but authenticity and durability will follow a different trade-off.
More bore, more compression and a bigger camshaft are not automatically improvements. Iron-head cooling, fuel quality, kicker loads, clutch capacity and bearing condition can become limiting factors. Define road use and reliability goals before machine work, and have any critical dimensions measured by a qualified vintage-Harley engine builder.
- Restore: document every original part before removal
- Street build: prioritize heat management, compression and starting behavior
- High output: plan for crank, valve-train, clutch and oiling load
- Avoid ordering modern Big Twin parts without verified fitment
What to ask before buying a Knucklehead
Request clear photographs of the heads, case numbers, engine left and right sides, transmission, generator, carburetor and any repairs. Ask who built the lower end, what bearing and cylinder work was done, when the engine last ran, how oil return was checked, and which parts are reproductions.
An old Knuckle can be a fantastic riding machine, a valuable preservation project or an expensive collection of mismatched castings. The real decision begins with documented condition, not a claimed horsepower number or a freshly polished rocker box.
- Engine and case provenance
- Cold-start and hot-start behavior
- Service records and compression/leakdown evidence
- Exact year/part-number compatibility
- Condition of brakes, tires, transmission and frame
KNOW THESE TERMS
Overhead valves operated by cam, tappets, pushrods and rockers
Oil held in a separate tank and recovered from the crankcase
Oil accumulating in the crankcase rather than remaining in the tank
Period charging component; not the later alternator system
Factory model-code families; confirm by year and VIN/engine numbers
TECHNICAL SOURCES & SERVICE LITERATURE
Core historical engine information comes from Harley-Davidson and researched historical references. This is a researched overview, not a claim that WTN physically rebuilt the pictured engine. Exact torque, tolerance, bearing-fit, electrical and machine-work procedures must come from the correct factory service and parts manuals.
- https://www.harley-davidson.com/us/en/content/expert-advice/history-harley-davidson-engine-types.html
- https://www.lowbrowcustoms.com/blogs/events-features/harley-davidson-engine-timeline-big-twins
- https://serviceinfo.harley-davidson.com/
Have an original shop manual or verified restoration detail? Discuss it with the WTN community.
NOVEMBER 2026 / WTN WORKSHOP ADDENDUM
Knucklehead — Advanced Mechanic’s Inspection File
1936–1947 overhead-valve Big Twin: practical system checks, identification risks, and recordkeeping for preservation and road reliability. Consult current factory and replacement-part technical sources before any safety-critical work.
Knucklehead mechanic’s note 1 — Case and crankcase identification
Study left/right case mating surfaces, repair welds, altered engine numbers, trapped debris around oil drillings, bearing supports and previous machining. Determine whether crankcases, heads and cylinders belong to the same historical version before choosing restoration standards. Photograph all stamps and casting features, and compare with the proper parts catalogue; do not treat any engine number as proof of the complete motorcycle’s originality.
Knucklehead mechanic’s note 2 — Oil feed, scavenge and rocker return
On a motor with an old-style oiling system, a wet-sump symptom may begin at check-valve seating, return path restriction, engine breathing or external line routing. Confirm line connections, pump type, timing and oil return using the period factory procedure. Crankcase puddling after extended storage must be distinguished from a persistent run-time scavenge fault. Label supply, return and vent hoses before removal.
Knucklehead mechanic’s note 3 — Valve gear and head inspection
The Knucklehead rocker-box layout has cast-iron-era tolerances and age-sensitive components. Measure guide condition, seat concentricity, rocker-bushing condition, spring installed height, valve-to-piston clearance and head sealing against the service data for that casting. Do not assume a modern ‘high-lift’ cam recommendation preserves the original heads or starter arrangement.
Knucklehead mechanic’s note 4 — Ignition, carburetion and starting
Check magneto/distributor configuration as actually fitted, point gap/dwell where applicable, condenser and coil, rotor phasing, battery grounds if equipped, carburetor float level and intake manifold sealing. A kick-start backfire can involve incorrect timing, manifold air leaks or kick sequence, not simply a worn carburetor. Record initial and running timing according to the fitted system, especially on non-original electronic ignition conversions.
Knucklehead mechanic’s note 5 — Bottom end service
Inspect pinion and sprocket shafts, flywheel alignment, rod bearing play, case bearing fits, oil pump drive and gear mesh. Document measurement method, temperature and applicable vintage service limits. Modern replacement crank and flywheel hardware may not interchange with original early variants; verify each matching part by number and machining detail.
Knucklehead mechanic’s note 6 — Restoration release checklist
Before first start: oil line routing and return confirmed, correctly timed ignition, free rotating engine, fuel supply clean, secure throttle return, safe brakes/tires and no fuel leaks. After first heat cycle: verify return flow, fastener/line sealing, hot noise and charging. Preserve photos, measurements and parts origins for future owners.
Shop record template
Frame VIN / case stamps: ____________________ Engine casting: ____________________ Bike year & trim: __________
As-found parts and historical alterations: _____________________________________________________________________
Symptoms and measured diagnostic results: _____________________________________________________________________
Factory manual / kit instruction revision: _____________________________________________________________________
Work performed / installed part numbers: _____________________________________________________________________
Hot verification / road test / follow-up: _____________________________________________________________________
Measurement policy: None of these notes supplies universal torque or clearance numbers. Wear limits and procedures vary by model year and replacement hardware. Obtain the correct factory service manual from Harley-Davidson’s service portal, current kit instructions and applicable repair bulletins. WTN’s descriptions are researched reference material, not firsthand engine tear-down test reports.
For later generations use the Twin Cam workshop guide and Milwaukee-Eight service guide.
WHITE TRASH NETWORKS / THE GARAGE
BUILT TO RIDE. RECORDED TO LAST.
WTN workshop files for the people keeping American iron on the road.
WTN WORKSHOP FIELD FILE / NOVEMBER 2026
KNUCKLEHEAD / OIL ROUTING & RESTORATION
Use this file alongside the engine chapters above. The following diagnostic and documentation workflows are WTN editorial guidance; published component requirements are linked by name.
Separate the complaint before dismantling
Write down whether the problem appears after storage, during a hot run, or after an oil-system change. Oil collecting while parked, oil collecting in a rocker enclosure and oil pushed from a breather are different observations. Record oil level using the correct model procedure and document the fitted pump, cover, return lines and external plumbing before changing anything.
For a mixed-parts motor, make a simple port-to-destination drawing with photographs. Identify each connection from the correct literature rather than its position on a similar-looking pump. This also gives the next person a record of what was actually assembled.
A larger pump is not the whole answer
S&S instruction 51-1041 specifically discusses limited Knucklehead top-end return capacity and the consequences of increased oil supply. The practical lesson is to verify feed and return as a system. A later drive ratio or pump cannot be selected solely because it appears to deliver more oil. Use the exact pump and case instructions for any metering or conversion work.
Make the restoration inspection useful
Ask the machine shop to identify each measurement location in its report: cylinder diameter, piston gauge point, valve/guide pairing and the condition of repaired castings. Keep the measured results and the chosen component maker’s limits together. “Rebuilt” without that record says little about what was inspected.
Label dismantled parts by cylinder and position. Retain old gaskets and photographs until their openings have been compared with the replacement set. Capture any previous thread repairs or altered oil passages in the build file; they can change what an otherwise correct replacement part requires.
At handover, record the agreed starting routine, oil-check method, fuel specification and the follow-up inspection required by the actual parts. Distinguish restoration choices from changes made for regular road use so future service work does not undo them by accident.
Primary references: S&S instruction 51-1041: Big Twin oil pumps · Harley-Davidson Service Information Portal. WTN research notes checked 17 November 2026; examples below are explanatory, not recorded WTN test results.