
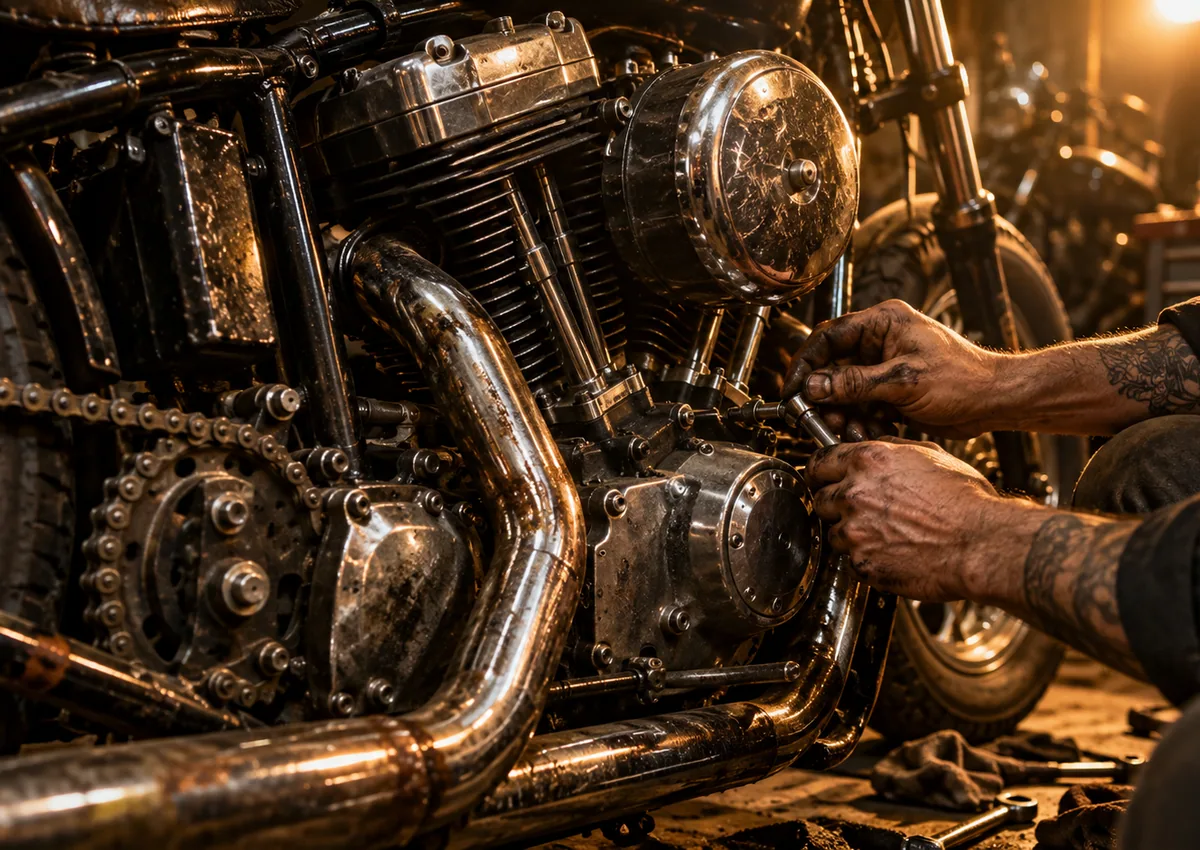
SHOVELHEAD: THE ENGINE, THE DESIGN AND THE REAL WORK.
The Shovelhead spans one of Harley-Davidson's most influential custom and touring eras. A 45-degree pushrod Big Twin with aluminum heads and separate-era drivetrain variations, it gave America the familiar long-haul FLH, FX Super Glide and countless garage-built choppers.
A factory Shovelhead is not one fixed specification. The 1966–1969 generator Shovel kept much of the Panhead-style lower end, the 1970-on alternator cone motor used redesigned cases and drive hardware, and later 80-inch versions brought further changes. Before buying one gasket, oil pump, cam or ignition component, identify the actual crankcases, heads and year.
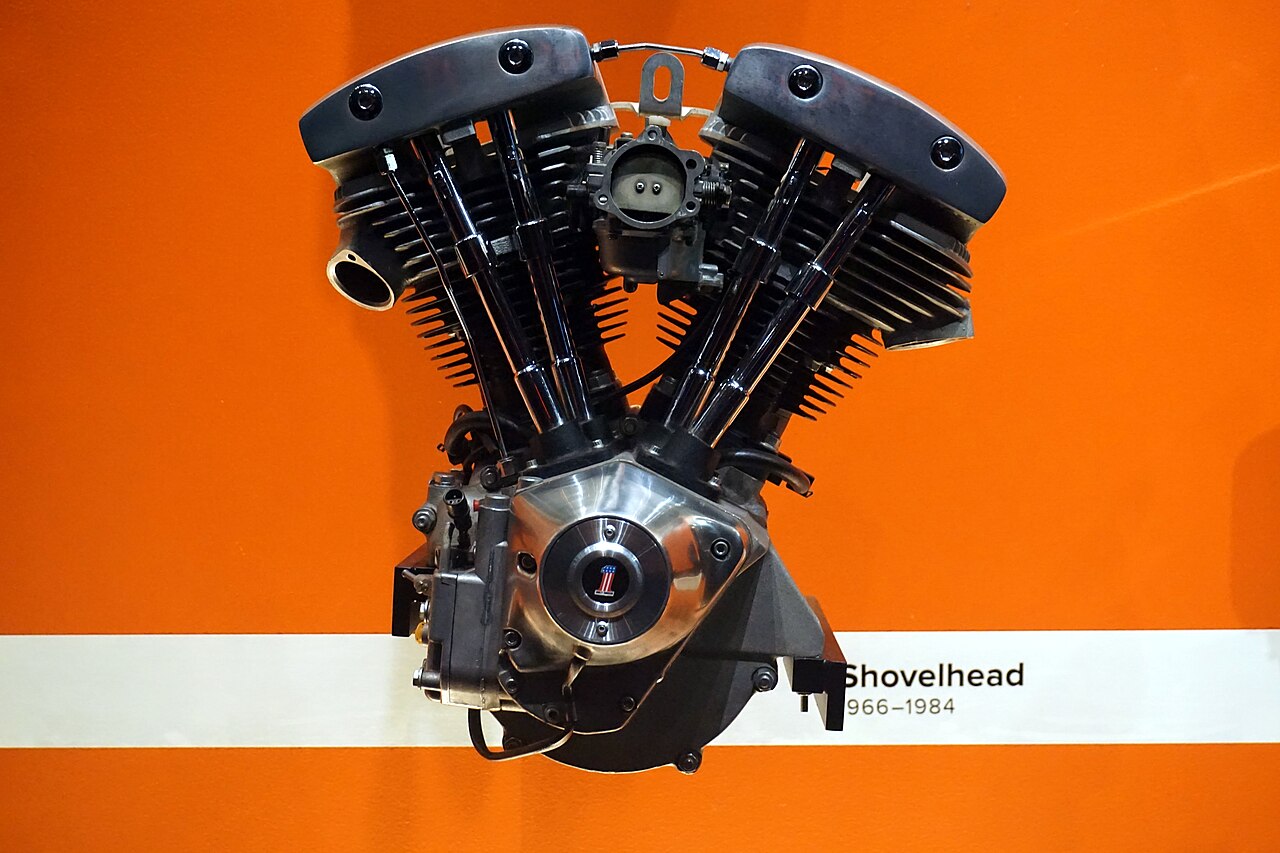
ENGINE IDENTITY
Years: 1966–1984
Displacement: 74 / 80 cubic inches
Architecture: Air-cooled pushrod 45-degree V-twin in historical Harley application; engine-family details vary.
Factory models changed throughout production. The correct engine serials, casting numbers, chassis and service documentation determine actual specification and part fitment.
FACTORY DEVELOPMENT TIMELINE
Historical guideShovelhead aluminum heads arrive on the Big Twin; 12-volt electrics
Generator Shovel, sometimes called slabside, with earlier-style lower end
Cone timing cover and alternator system replace generator layout
80-inch / 1340-class production engines begin appearing
Final mainstream Shovelhead period alongside the incoming Evolution
THE POWER AND OIL PATHS
These are conceptual illustrations only. Actual routing, valve train and lubrication differ by year and engine family; consult factory diagrams before repair.
ENGINE DESIGN AND RESTORATION
JUMP TO A SYSTEM
Shovelhead design and geometry
The 45-degree V-twin uses a common crankpin, traditional overhead valves, pushrods and rocker arms. A single gear-driven camshaft operates tappets, and the aluminum heads sit on iron cylinders. The unusual rocker-cover outline gives the engine its shovel nickname.
Under the rocker covers, correct valve stem and guide condition, rocker shaft support, lifter operation and pushrod geometry decide whether a motor stays quiet and reliable. Many historic Shovels have been decked, bored, stroker-converted or fitted with nonstandard cams; visual identification is only the beginning.
- Measure actual displacement and identify barrel/head combinations
- Identify stock vs aftermarket cam, springs and pushrods
- Check guide wear and top-end oil delivery
- Record case casting numbers before buying a kit
Generator Shovel versus cone Shovel
From 1966 through 1969, the bottom end shares much of the prior Panhead architecture and carries a front-mounted generator. These early motors are often called generator or slabside Shovels. A 1970 redesign introduced an alternator and a different timing-side case and cover, commonly recognized by the cone shape.
This change affects cam gear covers, crankcases, electrical systems, oiling and ignition arrangements. A catalog entry for a 1970s cone Shovel is not automatically right for a 1968 generator motor. Some show bikes combine later/earlier components or aftermarket cases, making full engine identification essential.
- 1966–69 generator layout; 1970 onward alternator cone layout
- Different case and cam-cover arrangements
- Check rotor/stator/generator components as fitted, not just the claimed year
- Confirm actual ignition and timing-drive hardware
The 74-inch and 80-inch engine eras
Most early Shovels are the nominal 74-inch family. Larger 80-inch engines appeared late in the 1970s and continued through the final years. This affects bore/stroke, cylinder choices, pistons, rods, compression ratio, oiling components and what might be reusable from an earlier engine.
Never assume a named displacement equals the current machined displacement. Years of overbores, crank rebuilds, stroker kits and conversions can alter the engine significantly. A vintage motorcycle marketed as an '80-inch Shovel' might be factory-spec, or a home-built combination requiring its own measurement record.
- Distinguish advertised nominal cubic inches from measured displacement
- Check piston-to-head clearance and compression for the installed crank/cylinders
- Match head gasket design to bore and deck condition
- Budget for machining and balancing in major displacement changes
Oil pump, scavenge and crankcase breathers
Dry-sump lubrication uses an oil tank, feed circuit, crankshaft and valvetrain passages, scavenge section and return line. The Shovelhead oil system received multiple factory updates through the years, so model-year pump and gear-case design should never be generalized into one diagram.
Top-end oiling trouble, high oil consumption, excessive breather discharge, oil in the crankcase after storage and low return flow can look similar to the untrained eye. Diagnose line routing, oil pump condition, check/relief operation, crankcase breathing, piston ring seal, clearances and return before replacing parts.
- Inspect oil-feed/return with a year-correct diagram
- Verify gear and pump compatibility across 1970s/1980s changes
- Check breather timing and engine vent restrictions
- Don't 'fix' a cold low tank reading by blindly adding oil
Heads, valves, lifters and heat
The Shovel's improved aluminum heads are an important performance feature, but heat remains central to keeping an older air-cooled engine alive. Valve guide fit, seats, rocker shaft condition, spring selection and cam timing are all measurable parts of a rebuild.
Exhaust heat, low-speed tuning, lean intake leaks, ignition advance and too-high compression can become bigger problems than a fashionable aftermarket component solves. Exhaust header fit, flange sealing and correct intake-manifold alignment also deserve attention, particularly on mismatched castings.
- Inspect valve seats and guides, not merely external leaks
- Match spring pressure to cam profile and rocker/valve parts
- Check intake seals before tuning the carburetor
- Document ignition timing under real operating conditions
Ignition, charging, fuel and hot starts
Period Shovels span generator, alternator, distributor/points, early electronic systems and decades of aftermarket ignition conversions. A bike that seems 'stock' may have a modern ignition hidden under the cover. Carburetors also changed over the long production span and are often owner-swapped.
Poor hot starting may be electrical or mechanical: weak charging, incorrect ignition advance, hot coils, fuel delivery, intake leaks, low compression or excessive valve lash. Start with a tested electrical system and simple mechanical baseline rather than compensating with an oversized carburetor or more fuel.
- Identify the ignition parts actually fitted to the motorcycle
- Check regulator and charging output under load
- Verify intake-manifold sealing before changing jets
- Check timing and compression before diagnosing an allegedly 'bad carb'
Case integrity, primary, gearbox and chassis
The Big Twin engine drives the primary/clutch and gearbox as a system. Conventional FL/FX four-speed arrangements differ from some later rubber-mounted touring and FXR layouts. Primary drive, oil filtration, final drive and transmission hardware vary across models.
A performance increase that ignores clutch capacity, worn primary chains, engine mounts and brake/tire condition is an incomplete build. For original restoration, a correct engine doesn't prove a frame and transmission are correct for the period.
- Inspect mounting bosses and old case repairs
- Measure crank runout and bearing condition as specified
- Verify gearbox/primary alignment and clutch condition
- Treat rubber-mount FLT/FXR packages as distinct from older 4-speed layouts
The Shovelhead builder's diagnostic sequence
Begin with numbers, visible hardware and a service history. A compression/leakdown baseline where suitable, stable oil return, proper electrical charging and correctly sealed manifolds help determine whether the machine needs a tune, top-end repair or an expensive full rebuild.
Persistent exhaust smoke, piston slap, abnormal oil carryover, electrical problems and overheating are symptoms requiring a repeatable test plan. Avoid chasing five problems at once. Mark observations by cold start, warm idle, road load and after shutdown, and retain photographs.
- Engine family and case identification
- Charging/ignition test
- Intake leaks and baseline compression
- Oil feed/return and breather behavior
- Cam, rocker, guide and bearing measurements
Sensible upgrades versus show-bike modifications
A road-going Shovel benefits enormously from accurate oil sealing, safe charging, improved valve seats, conservative compression and balanced carb/exhaust selection. Better stopping and suspension often transform the ride more than engine changes.
A show chopper may prioritize visual originality, unusual exhaust, a jockey shifter or extreme front-end geometry. These decisions affect reliability, starting, noise, roadworthiness and rider safety. Make the goal explicit and retain old components if preservation matters.
- First choice: restore healthy oiling, valve train and electrics
- Then: matched intake/cam/exhaust with measured fitment
- Check clutch, primary and brake improvements alongside power
- Keep documentation of case changes and custom-machined parts
Shovelhead buying and restoration records
Ask for cold-start video, service receipts, case and cylinder photographs, oil return observations and who did the machine work. Identify whether it is an early generator motor, 74-inch cone motor, 80-inch late motor or a mixed-parts custom. A recently painted engine can still need expensive internals.
Price a major rebuild on realistic parts and specialist labor, not just a gasket set. If the seller cannot identify its pump, cam, ignition, compression or bottom-end work, treat those as unknowns. The most useful vintage Shovel is the one with documented maintenance, not the loudest exhaust.
- Confirm factory year vs current components
- Check top-end rebuild and oil-pump history
- Look for cracks, repairs and case-number anomalies
- Verify current charging, ignition, brakes and tires
ENGINE VOCABULARY
1966–1969 lower-end and charging configuration
1970-on timing-side/alternator layout
Oil accumulating in crankcase after parking or failed scavenging
Mechanism controlling crankcase ventilation
Nominal factory 80-cubic-inch displacement family
SOURCES, FACTORY LITERATURE & CREDITS
Engine dates, architecture and historical changes were checked against manufacturer and technical historical sources. This researched guide does not imply WTN has disassembled or dynamometer-tested this particular museum engine. Exact torque settings, machining tolerance, electrical wiring and oil flow must come from correct factory literature and professional inspection.
NOVEMBER 2026 / WTN WORKSHOP ADDENDUM
Shovelhead — Advanced Mechanic’s Inspection File
1966–1984, generator/alternator, 74/80-cu-in: practical system checks, identification risks, and recordkeeping for preservation and road reliability. Consult current factory and replacement-part technical sources before any safety-critical work.
Shovelhead mechanic’s note 1 — Generator Shovel versus cone Shovel split
The 1966–1969 generator cases and later cone-style alternator systems are not identical. Match cam cover, ignition drive, charging components, crank cases, oil-pump design and front-end accessories by exact hardware. Later 80-inch configurations introduce additional part changes; model year alone is not a dependable substitute for measured displacement or existing replacement parts.
Shovelhead mechanic’s note 2 — Heat management and top-end sealing
Check head gasket surface, cylinder base, valve guide and exhaust-port condition before changing jetting or timing. Document hot start behavior, pinging under steady load, oil condition, and whether a loose exhaust flange or intake leak is exaggerating engine heat. The typical workshop path is to prove the problem rather than treat every noisy Shovel as inherently unreliable.
Shovelhead mechanic’s note 3 — Lifter styles, cam drive and rocker service
Identify solid versus hydraulic lifters, aftermarket pushrod type, gear/cam application and rocker arms. Record valve timing components, endplay/clearance measurements, bushings, shaft wear and spring pressure using the particular cam and head maker’s instructions. A high-lift cam can demand machining and piston/valve clearance checks that a stock cam did not.
Shovelhead mechanic’s note 4 — Oil pump and breathing after modifications
Many Shovels have non-original pumps, gear covers, vent hoses or tank arrangements. Trace supply, scavenge and crankcase ventilation before running a reworked engine. Oil emerging at the air cleaner may result from trapped oil, breather timing, excess oil level or ring blow-by; collect observations instead of replacing a pump as a first guess.
Shovelhead mechanic’s note 5 — Ignition era and charging checks
Factory and aftermarket systems may include points, electronic ignition, a different alternator and non-stock wiring. Measure battery state, charging voltage, hot restart spark, grounds and timing stability rather than assuming the engine has its factory wiring. A ‘points-to-electronic’ conversion still needs correct coil compatibility and timing procedure.
Shovelhead mechanic’s note 6 — Road-use build and workshop sign-off
Inspect clutch release, primary drive, chain/belt final drive, brake capability, tire age and chassis alignment along with engine upgrades. A touring Shovel should be verified under real operating temperature and load, not only at a cold idle. Log oil return, plugs, hot start and abnormal leaks after the road test.
Shop record template
Frame VIN / case stamps: ____________________ Engine casting: ____________________ Bike year & trim: __________
As-found parts and historical alterations: _____________________________________________________________________
Symptoms and measured diagnostic results: _____________________________________________________________________
Factory manual / kit instruction revision: _____________________________________________________________________
Work performed / installed part numbers: _____________________________________________________________________
Hot verification / road test / follow-up: _____________________________________________________________________
Measurement policy: None of these notes supplies universal torque or clearance numbers. Wear limits and procedures vary by model year and replacement hardware. Obtain the correct factory service manual from Harley-Davidson’s service portal, current kit instructions and applicable repair bulletins. WTN’s descriptions are researched reference material, not firsthand engine tear-down test reports.
For later generations use the Twin Cam workshop guide and Milwaukee-Eight service guide.
WHITE TRASH NETWORKS / THE GARAGE
BUILT TO RIDE. RECORDED TO LAST.
WTN workshop files for the people keeping American iron on the road.
WTN WORKSHOP FIELD FILE / NOVEMBER 2026
SHOVELHEAD / HOT START & CARBURETION
Use this file alongside the engine chapters above. The following diagnostic and documentation workflows are WTN editorial guidance; published component requirements are linked by name.
Split slow cranking from cranks-but-will-not-fire
Those two complaints lead down different paths. For an electric-start machine that turns slowly when hot, record battery voltage and loaded cable/ground voltage drops while the symptom exists. A cold test may miss a heat-related problem. Check against the model’s electrical specifications before buying a starter.
If it cranks normally but will not fire, record the hot-start procedure, ignition system, fuel condition and the last changes. Capture evidence of spark, mixture and compression using the relevant service methods. Repeated throttle pumping can change the condition being diagnosed on a carburetor fitted with an accelerator pump.
Treat the carburetor and exhaust as a combination
For S&S Super E/G-equipped machines, use the corresponding carburetor instructions and identify the actual jets, air-bleed arrangement and accelerator-pump setting. Check mounting support, cable operation, manifold sealing and fuel supply before making mixture changes. Exhaust reversion can affect carburetor behaviour; a tuning difficulty does not automatically mean the main jet is wrong.
Change one setting at a time and write down the before/after result at the same temperature and load. Keep cruising, transition and wide-throttle complaints distinct. Do not transplant another rider’s settings without recording the differences in displacement, heads, cam, air cleaner and exhaust.
Document the heat-soak test
Build a repeatable record: length and type of ride, stop duration, ambient conditions, starter behaviour and what restored normal operation. If the fault disappears after cooling, that is a useful condition to reproduce, not a component diagnosis.
On a kick-start machine, document the installed ignition and the agreed starting method instead of applying electric-start circuit tests. A change in starting behaviour after cam or ignition work should send you back to the changed system and its setup records.
Before release, verify stable idle, throttle return and restart behaviour with the final air cleaner and exhaust fitted. Keep hands and test leads clear of the hot and moving parts; fuel leaks call for repair before further running.
Primary references: Fluke: starter-circuit voltage-drop testing · S&S instruction 510-0251: Super E/G carburetors · Harley-Davidson Service Information Portal. WTN research notes checked 17 November 2026; examples below are explanatory, not recorded WTN test results.