
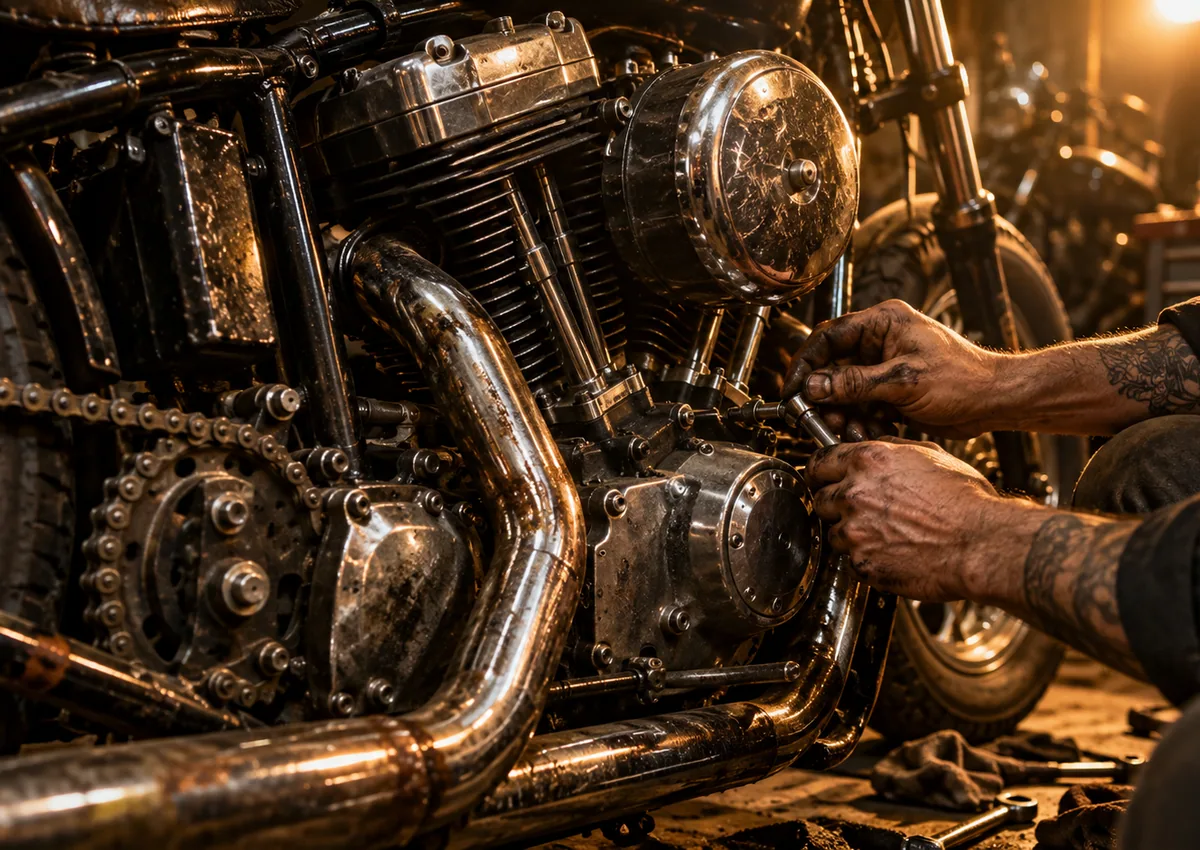
PANHEAD: THE MOTOR, THE DESIGN AND THE REAL WORK.
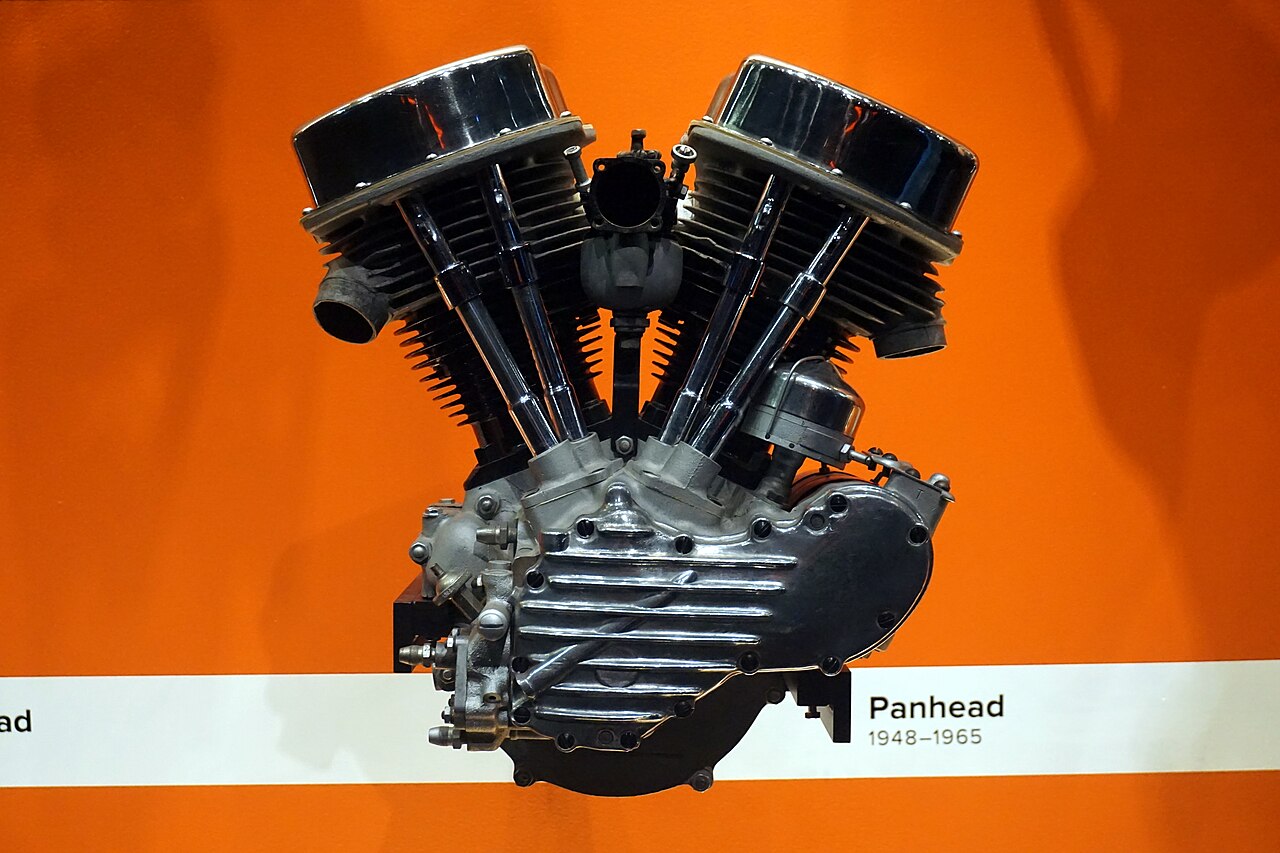
The Panhead brought aluminum cylinder heads, hydraulic valve lifters and better oil management to Harley's overhead-valve Big Twin, while retaining the unmistakable 45-degree architecture and separate drivetrain that shaped generations of American customs.
1948–1965 factory Panheads included 61- and 74-cubic-inch configurations; larger-displacement 74-inch FL family machines dominated later production. Several mid-cycle changes, including the 1965 electric-start Electra Glide, make model-year identification essential.
ENGINE IDENTITY
Years: 1948–1965
Nominal displacement: 61 cu in / 74 cu in
Layout: Air-cooled 45-degree pushrod V-twin; two valves per cylinder, historical Big Twin construction
These are general family characteristics. Build year, specific model and the actual parts installed determine correct service parts and procedures.
FACTORY DEVELOPMENT TIMELINE
Not a full serial-number databaseAluminum heads and the pan-shaped covers replace the Knuckle top end
61-inch and 74-inch era ends with focus shifting toward the 74-inch family
Electric-start Electra Glide appears in the final Panhead model year
HOW THIS V-TWIN MAKES POWER
A simplified conceptual map. Exact oil and valve routing depend on the model and modification history; it is not a workshop service diagram.
ENGINE TECH LIBRARY
JUMP TO A SYSTEM
Panhead architecture
The Panhead retains a 45-degree air-cooled V-twin, central crank, single gear-driven camshaft and four pushrod-operated overhead valves. The most visible change from the Knucklehead is at the top: aluminum heads and broad smooth stamped rocker covers that inspired the 'pan' nickname.
Aluminum can shed heat more effectively than cast iron, but head temperature, valve-seat condition, guide wear and correct gasket surfaces remain fundamental. The shallow-looking covers do not make the valve train interchangeable with later Shovelhead heads.
- 45-degree Big Twin and pushrod OHV layout
- Aluminum heads, iron barrels and separate engine/gearbox
- Rocker pans act as covers, not generic replacements for later rocker boxes
- Engine numbers and actual castings outrank appearance alone
Hydraulic lifters and valve-train design
Harley's use of hydraulic lifters was a key step toward more forgiving road maintenance than the solid-adjustment era. The lifter assembly uses controlled oil pressure to manage lash, but it still depends on clean oil, correct internal parts and the right pushrod/rocker geometry.
Noisy tappets, collapsed lifters, poor pump delivery, rocker-arm wear and incorrect adjustments can sound similar. A lifter is not a cure for weak valve springs or worn valve guides. Determine whether a used motor has stock hydraulic parts, solid replacements or modified pushrod lengths before applying any adjustment procedure.
- Identify hydraulic vs converted solid tappets
- Check lifter oil-feed and bleed-down behavior with the appropriate service manual
- Inspect rocker shaft and valve guide clearances
- Confirm cam profile matches spring and piston-to-valve clearances
Oil supply, return and ventilation
Panhead oil supply and scavenging continue the dry-sump concept, with improvements introduced over its predecessor. Oil should reach critical bearings and the top end while excess is collected and returned to the external tank. Cases, pumps, lines, check balls and breathers must work as a system.
After sitting, an aged check system may allow oil to collect in the crankcase. This can cause excess breather discharge on startup. But a motor that chronically smokes, runs hot, fails to return oil or leaks heavily needs diagnosis of ring sealing, breather timing, pump integrity and line routing.
- Trace feed and return lines before first startup on a new-to-you build
- Check rocker oil-feed arrangement for the year and aftermarket parts
- Inspect crankcase venting and tank level correctly
- Use correct gaskets and verify flange condition rather than overtightening covers
Heads, combustion and cooling
Panheads combine aluminum heads with a vintage combustion chamber and period intake/exhaust geometry. Compression, ignition timing, air/fuel delivery and exhaust backpressure affect both drivability and heat. A head that has been repeatedly surfaced or repaired needs measurement rather than a visual guess.
Rebuild plans should cover valve seats, guide material, valve stem wear, spring installed height and sealing surfaces. Engine builders must measure the assembled combination because replacement piston dome shapes and decades of machine work can change compression and clearances.
- Use documented head, chamber and piston measurements
- Check valve-seat recession and guide condition
- Confirm exhaust flange and manifold sealing
- Account for fuel octane and cooling when raising compression
Carburetors, ignition and electrical eras
Most Panheads use carbureted induction and period generator charging equipment; ignition may still be mechanical or have been updated by an owner. The final-year 1965 Electra Glide introduced electric starting, a significant chassis/electrical change but not a reason to treat every 1965 part as compatible with a 1950 machine.
When an older Pan is difficult to start, the best first moves are a tested battery and ignition, good compression, correct manifold sealing and the factory-aligned ignition procedure. Larger carburetors often trade low-speed signal for top-end potential.
- Identify the actual carburetor/manifold version
- Verify generator, regulator, starter and wiring changes by year
- Confirm ignition advance and grounding rather than swapping parts blindly
- Treat kick-only and electric-start arrangements as different systems
Lower-end and transmission identity
The Panhead is one chapter of the traditional Big Twin architecture, with a separate primary drive and transmission. A machine may use original cases and flywheels, but it might also carry a later transmission, alternator conversion or a custom primary. A pan-style top end is not enough to identify the underlying bottom end.
A quality assessment includes case provenance, flywheel and rod-bearing condition, oil pump configuration, timing gear alignment, clutch, chain drive and associated seals. Frame and transmission modifications should be documented separately from engine originality.
- Inspect engine case numbers and any aftermarket replacements
- Look for repaired case mounting bosses and compromised studs
- Identify primary, clutch and transmission parts by actual hardware
- Plan drivetrain load if increasing displacement or compression
Typical Panhead problems and inspection
Riders report persistent rocker-cover seepage, aged oil seals, wet-sumping after storage, charging trouble, oil consumption and valve-train clatter. Each deserves a fault tree rather than blaming the whole design. Bad manifold seals, out-of-date carburetion and incorrect ignition are especially easy to confuse with an internal mechanical problem.
Inspect compression and leakage, service oil-feed/return function, check the electrical charging circuit, assess exhaust smoke under known conditions and verify valve-train geometry. When a bike has sat for years, replace unsafe consumables and inspect brakes, wheel bearings and tires before road use.
- Document condition before teardown
- Don't mistake a parked-engine oil discharge for evidence of every oiling fault
- Investigate persistent low oil return, smoke or noise
- Use factory tolerances and specialist measurement on major work
Building a roadgoing Pan versus a period restoration
A historically accurate Panhead keeps model-specific finishes, induction, controls and correct rocker hardware. For regular riding, a well-planned build may use improved valve seats, modern seals, better ignition and carefully selected charging components. All changes should respect authenticity goals and fitment constraints.
Performance gains depend on the entire combination: intake velocity, compression, cam, exhaust, clutch and heat management. A trustworthy engine shop should explain measured clearances and durability, not promise a generic horsepower figure from one part.
- Choose originality or use first, then source parts
- Prioritize oil sealing, cold/hot starting and charging
- Plan matched cam/compression/exhaust combinations
- Verify heat and fuel requirements after any head or piston modifications
What a buyer should ask
Have the seller demonstrate a cold start and provide records of the last head, crank and gearbox work. Examine the rocker pans for leaks and bolt distortion, ask about the oil pump and valve seats, and identify whether electrics, ignition and exhaust are year-correct or later upgrades.
Panheads remain a cornerstone of custom Harley culture. Their value as a riding machine is determined by the quality of engineering and maintenance as much as by period-correct external appearance.
- Actual year and engine-case provenance
- Head and valve-seat repair history
- Lifter type and pushrod specification
- Generator or electric-start conversion details
- Oil return, charging and heat behavior
KNOW THESE TERMS
Oil-supported mechanism compensating for valve-train lash
Stamped outer cover that inspired the Panhead nickname
Bore supporting valve-stem travel through the head
Unmetered intake air causing difficult tuning or hot running
1965 electric-start milestone within the late Panhead era
TECHNICAL SOURCES & SERVICE LITERATURE
Core historical engine information comes from Harley-Davidson and researched historical references. This is a researched overview, not a claim that WTN physically rebuilt the pictured engine. Exact torque, tolerance, bearing-fit, electrical and machine-work procedures must come from the correct factory service and parts manuals.
- https://www.harley-davidson.com/us/en/content/expert-advice/history-harley-davidson-engine-types.html
- https://www.lowbrowcustoms.com/blogs/events-features/harley-davidson-engine-timeline-big-twins
- https://serviceinfo.harley-davidson.com/
Have an original shop manual or verified restoration detail? Discuss it with the WTN community.
NOVEMBER 2026 / WTN WORKSHOP ADDENDUM
Panhead — Advanced Mechanic’s Inspection File
1948–1965 Big Twin with aluminum heads and hydraulic lifters: practical system checks, identification risks, and recordkeeping for preservation and road reliability. Consult current factory and replacement-part technical sources before any safety-critical work.
Panhead mechanic’s note 1 — Hydraulic tappet and pushrod diagnosis
Confirm whether the engine has original-type hydraulic tappets, modern replacements or a solid-lifter conversion. Cold ticking and hot ticking have different likely causes; before replacing parts, establish oil supply, tappet condition, preload setting or solid clearance as applicable, rocker arm wear and correct pushrod length. The wrong lifter adjustment can cause valve damage or poor starting.
Panhead mechanic’s note 2 — Aluminum-head service
Inspect combustion chambers, valve seat retention, guide-to-valve clearance, fin and exhaust-port damage and the head-to-cylinder joint. A restored aluminum casting may have aftermarket guide material or insert repairs, so identify actual components rather than using catalog dimensions blindly. Check cylinder/head surfaces and stud integrity during any gasket repair.
Panhead mechanic’s note 3 — Oiling and breather paths
Map feed, return and breather circuits on the assembled engine; confirm oil pump type and model-year oil line arrangements. A static seep or occasional wet sump after a long standstill does not by itself prove a failing engine. Verify return once warm and investigate hot oil pressure only with the correct period standard and a suitable test instrument.
Panhead mechanic’s note 4 — Primary, transmission and charging generations
Panhead motorcycles crossed significant electrical and drivetrain revisions; document six- versus twelve-volt conversions where relevant, generator output, charging control, primary drive and starter configuration, including late-era electric-start fitments. A no-start complaint can be a charging/ground problem or transmission/primary drag rather than ignition timing alone.
Panhead mechanic’s note 5 — Valve seat and modern fuel considerations
Document compression ratio, combustion chamber condition, spark plug heat range and fuel grade before raising compression or advancing ignition. Period heads and piston crowns differ from aftermarket configurations. Look for carbon hot spots, detonation evidence, ring/bore wear and exhaust sealing when diagnosing persistent heat.
Panhead mechanic’s note 6 — Purchase and post-restoration documentation
For a prospective engine, obtain case numbers, head casting marks, repair receipts, oil-system photographs, hot-running video and invoices for machining. A glossy paint finish is not evidence of correct crank alignment, properly fitted valve guides or oil return. Make an as-found work order before cosmetic work.
Shop record template
Frame VIN / case stamps: ____________________ Engine casting: ____________________ Bike year & trim: __________
As-found parts and historical alterations: _____________________________________________________________________
Symptoms and measured diagnostic results: _____________________________________________________________________
Factory manual / kit instruction revision: _____________________________________________________________________
Work performed / installed part numbers: _____________________________________________________________________
Hot verification / road test / follow-up: _____________________________________________________________________
Measurement policy: None of these notes supplies universal torque or clearance numbers. Wear limits and procedures vary by model year and replacement hardware. Obtain the correct factory service manual from Harley-Davidson’s service portal, current kit instructions and applicable repair bulletins. WTN’s descriptions are researched reference material, not firsthand engine tear-down test reports.
For later generations use the Twin Cam workshop guide and Milwaukee-Eight service guide.
WHITE TRASH NETWORKS / THE GARAGE
BUILT TO RIDE. RECORDED TO LAST.
WTN workshop files for the people keeping American iron on the road.
WTN WORKSHOP FIELD FILE / NOVEMBER 2026
PANHEAD / TAPPETS & TOP-END WORK
Use this file alongside the engine chapters above. The following diagnostic and documentation workflows are WTN editorial guidance; published component requirements are linked by name.
Identify the tappets before chasing a tick
A Panhead can contain original-style parts, later conversions or aftermarket replacements. Write down the tappet and pushrod makers before adjusting anything. A hydraulic unit, a solid conversion and a travel-limited design do not share one universal adjustment routine.
Record whether the noise occurs immediately after starting, persists when fully warm, follows rpm or first appeared after head work. Localize it before dismantling. Separate an oil-supply question from wear, geometry or an adjustment problem; changing the setting without identifying the hardware can obscure the original evidence.
Why head work can change the pushrod requirement
Valve work can change stem protrusion, while head milling and gasket changes move the top end relative to the cam. HAMMER’s pushrod reference explains these relationships. Use the actual lifter maker’s preload or lash method and verify the completed assembly rather than assuming the old pushrods remain correct after machining.
Have the head shop record the installed valves, guide work, spring installed heights and the cam/lifter combination for which the heads were prepared. Give that information to the person assembling the motor before the parts are ordered.
Keep the oiling generation visible
S&S 51-1041 distinguishes the 1963–1965 outside-oiler Panheads from other case groups in its conversion guidance. Treat external lines and passages as part of a matched system. Identify the case, heads and pump together; do not copy a port-plugging arrangement from another Panhead.
A useful work-order sketch shows where every external line begins and ends, with the source drawing beside it. Photograph the assembled routing before the tanks conceal it. If a previous builder combined generations, resolve that combination against the parts makers’ instructions before making another change.
Close the job with a repeat observation under the conditions that caused the complaint. Record the result as “noise reproduced,” “noise absent under these conditions,” or “not yet tested”; those statements are much more useful than an unexplained check mark.
Primary references: HAMMER Performance: pushrod length · S&S instruction 51-1041: Big Twin oil pumps · Harley-Davidson Service Information Portal. WTN research notes checked 17 November 2026; examples below are explanatory, not recorded WTN test results.